How to translate slides
Updated March 16, 2024
Slide translation on-demand is now available. Enabling this means that you no longer have to manually generate automatic translations for each language, instead you only have to set the original language of the slides and assign the slides to your session. When the audience enables their language, the system will automatically generate the automatic translation for it. Please note that the session must have translation on-demand also enabled for this to work as expected.
Slide Translation On-Demand
Step 1: Go to the Dashboard and click Resources > Slides.
Step 2: Click the Upload Slides button.

Step 4: Select the source language of the slides from the dropdown menu.
Step 5: Switch on the Enable slide translation to activate slide translation on-demand.
Step 6: Upload your slides by dropping the PDF, PPTX, or image file.

Step 7: Click the translate icon ( ![]() ) to translate the slides.
) to translate the slides.

Step 9: Click the Add translation.

Step 10: You can edit the translation for each line by clicking the Edit icon ( ![]() ).
).

Step 11: You can also make additional edits, such as:
a. Adding slides by clicking the ( ![]() ) icon to import from existing slides or media as well as adding videos.
) icon to import from existing slides or media as well as adding videos.
b. Translating a specific slide by clicking the ( ![]() ) icon.
) icon.
c. Clearing translation from a specific slide by clicking the ( ![]() ) icon.
) icon.
d. Deleting a specific slide by clicking the ( ![]() ) icon.
) icon.

Step 12: When you’re done editing the translation, click the ( ![]() ) icon to download the slides.
) icon to download the slides.

Step 13: Assign the slides to your session using a playlist. Then, when an audience member visits your session’s mobile view, they select their language and will see the slide translation as slides are released. It’s that easy!
Slide Translation (Old Method)
Updated December 5, 2019
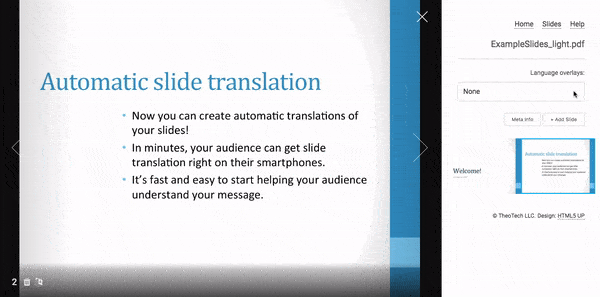
Automatic slide translation enables your audience to easily get your slides in their native language on their mobile devices. Here’s how you can get started in 6 steps.
Step 1: Upload your slides
Click here for instructions on how to upload slides. You can upload your slides as a PDF file or as images.
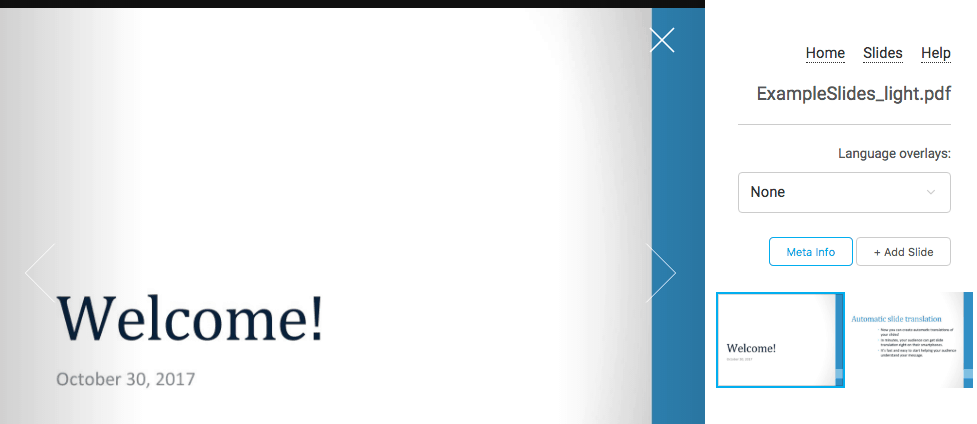
Step 2: Open the slides’ meta info
Click to open the slides and click on “Meta info”.
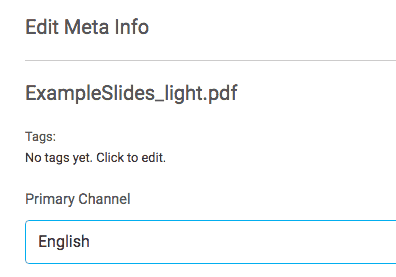
Step 3: Define the primary channel of the slides
Select the language that the slides are written in. Then click “Close”
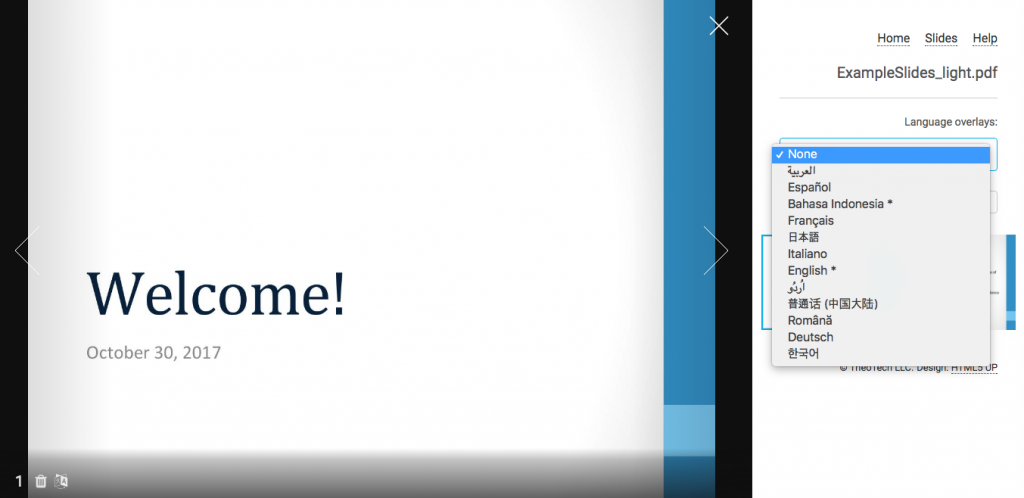
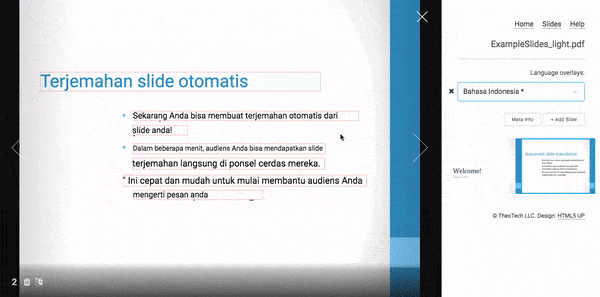
Step 4: Select the language you want to translate into
In the language overlay dropdown, pick a language you want to translate into. In this example, we selected “Bahasa Indonesia”.
If the language overlay for “Bahasa Indonesia” does not exist yet, you will be prompted to create it. Select “Yes” and you will see a progress bar while the slides are being translated.
Step 4.5 (Optional): View the results and make corrections
When the process is complete, you will see your slides overlaid with the translations.
The text detected on the slide is highlighted with a thin red box. You can click on the text and make corrections to the translation if you wish. Press “Save” to save your changes.
If the replacement text from the translation does not fully cover the original text, you can adjust the line height to perfect it.
Step 5: Add your slides to a session
If you haven’t already, create a session for your presentation and assign your slides to it. If you have multiple pieces of prepared content for your session, use a playlist to assign them all to one session.
Step 6: Share your session url with your audience and deliver a great multilingual presentation
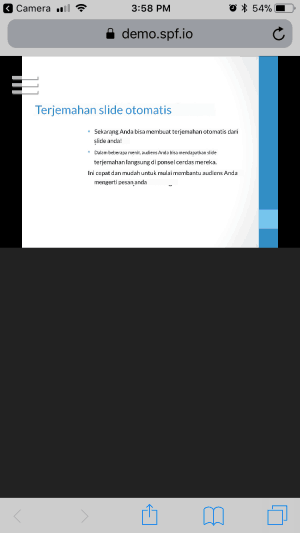
The session’s QR code or URL is located in the session editor. Share them with your audience so they can access translation on their mobile devices.
Your audience selects their language and then they will see the translated slides on their mobile device as you release the slides in your native language.