How to setup spf.io with OBS for Captioning or Subtitling a Livestream
This tutorial assumes you have OBS installed and a spf.io session created. We will use automatic captioning/translation in this example, but other spf.io methods for releasing subtitles like manuscripts can work just as well.
There are two ways to caption or subtitle your OBS livestream.
The first method is to use open captions, which are always visible. The second is to use closed captioning, which currently works when streaming from OBS to Twitch or Vimeo, but has variable support among other services. You can display captions or translations with either approach. The first part of this article covers Open Captions (also known as hardsub). The second part covers Twitch or Vimeo Closed Captions through OBS.
Method 1: Open Captions
Step 1: Setup automatic captioning/translation
You can use either the raw captioning setup (for captioning only) or the auto-caption + translate setup. Follow the instructions linked above then return here.
Step 2: Open the projector view for your session
Click on the “Start Projector” button for the session. 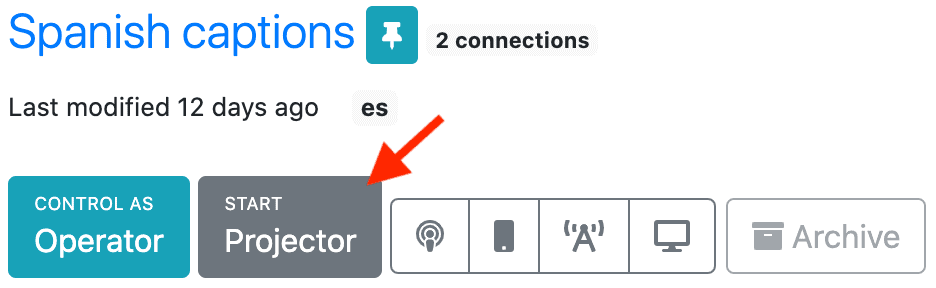
Step 3: Configure subtitles and enable chroma key background
In the projector controller, open the subtitles/closed captioning configuration. If you do not see the “CC” button, click on the plus sign and check off “Subtitles” to enable it. 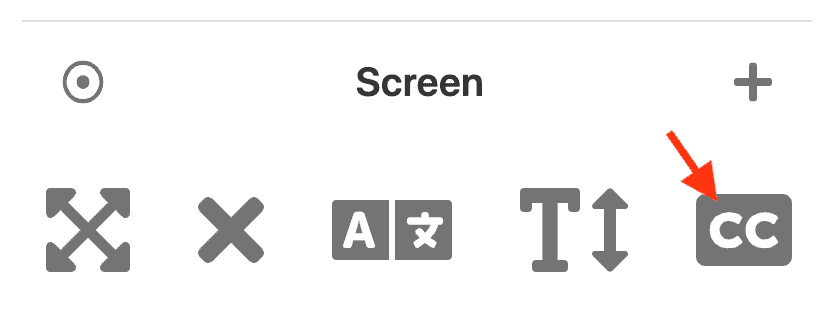 Ensure “Enable display” is active. Change settings to make the subtitles/captions look the way you want. For example, many people choose to enable “Scroll” and “Text shadow” for visibility.
 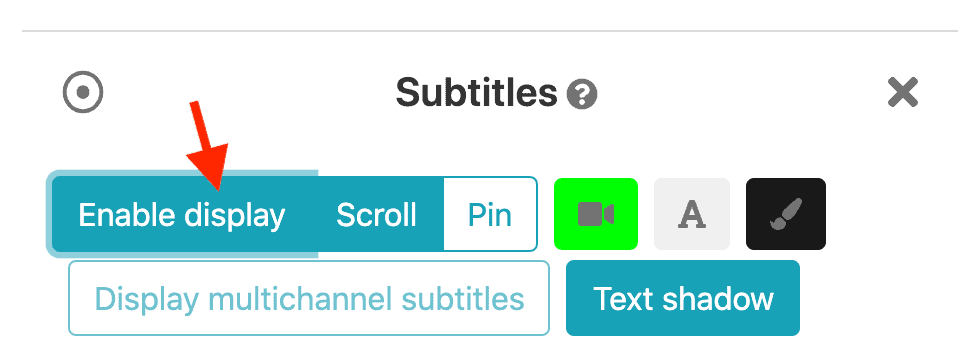 Click on the Chroma Key background button. This will change the background color of your projector view to be the chroma key color. The default green color is sufficient.
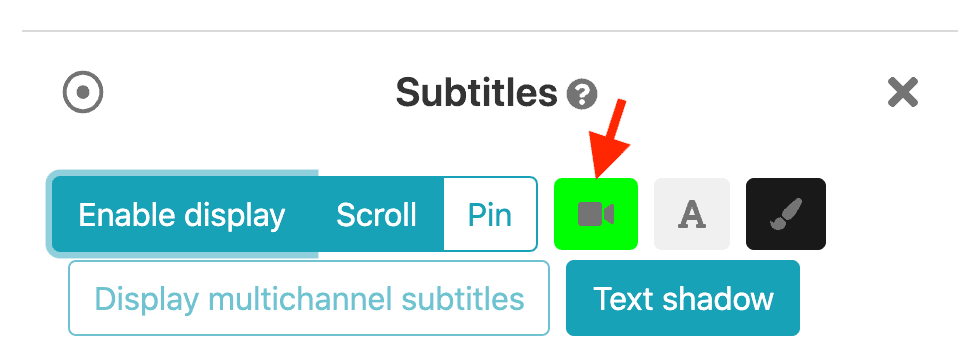
Step 4: Open OBS and add the projector view as a window source
In the Sources panel of OBS, click on the plus sign at the bottom and select “Window Capture”. 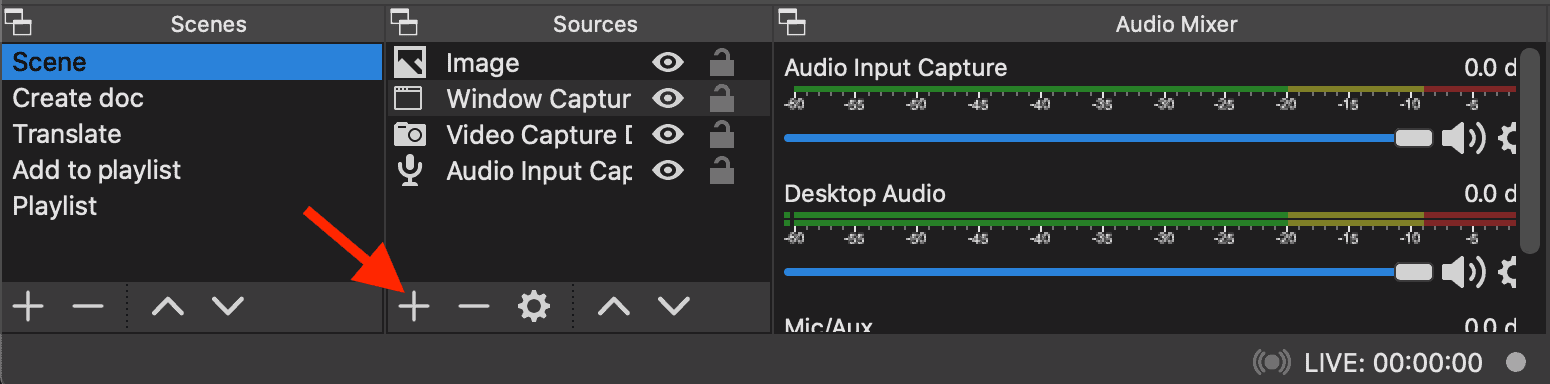 You will see a list of windows that you can add to the Scene. Select the Projector View window and press “OK”.
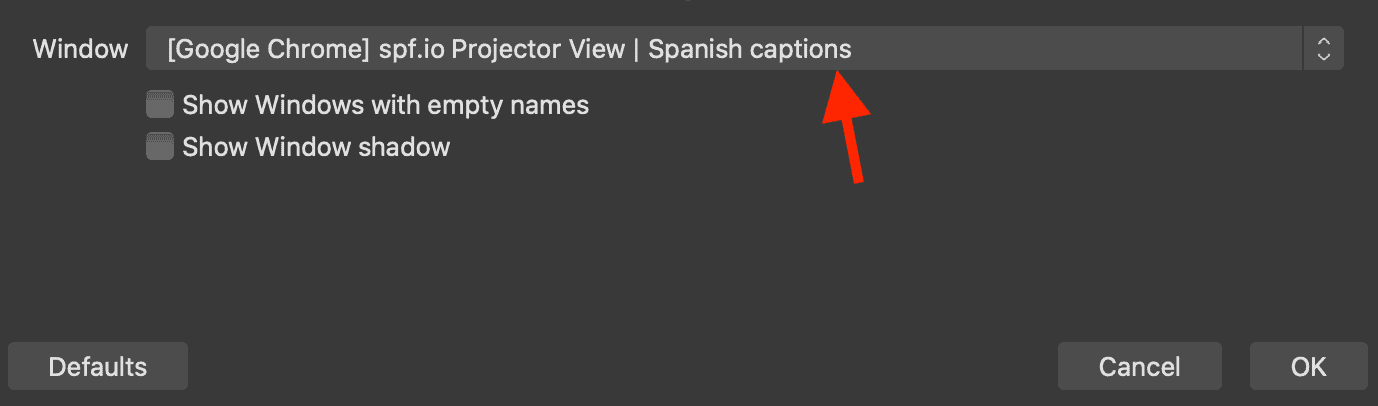
Step 5: Apply the chroma key filter and crop the window
Drag the Window Capture source you added to the top of the list of Sources. This ensures the subtitles will be visible.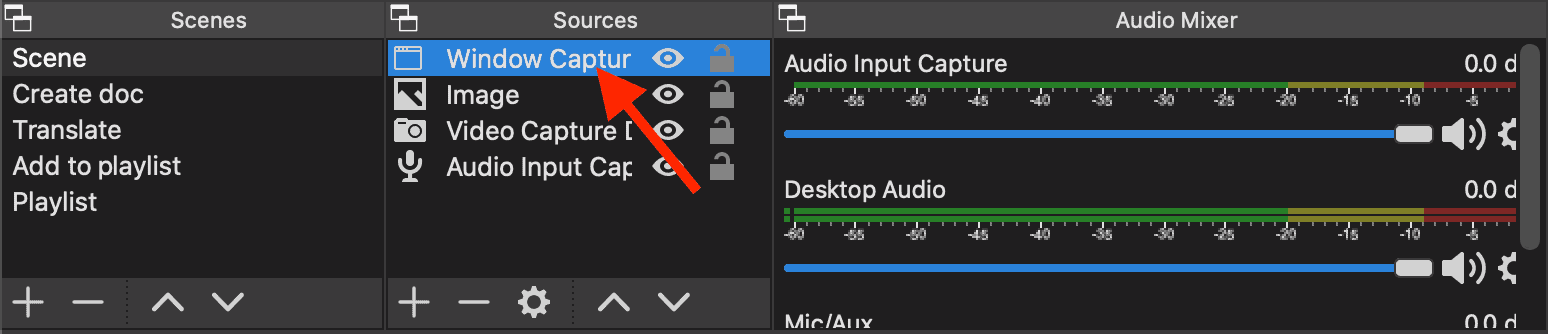 Next right click on the Window Capture source and select “Filters” from the menu. In the lower half of the Filters window, you will see a list of “Effect Filters”. Click on the plus sign and add a “Chroma Key” filter. By default it will select the Green “Key Color Type” which matches the chroma key color of spf.io’s projector view. Close the filters window.
 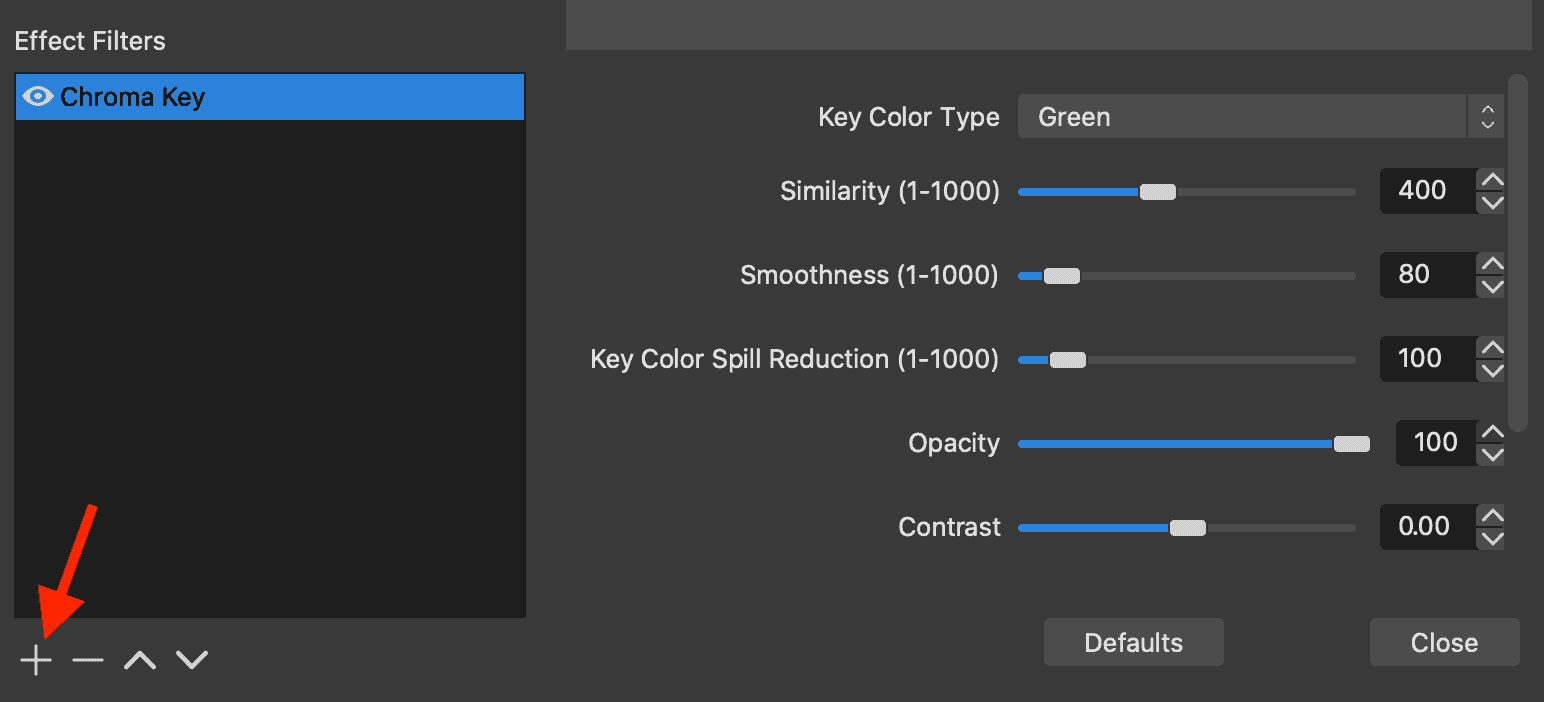 Now in your OBS preview you should be able to see through the projector view to the rest of your Scene. However, the browser address bar and part of the bottom of the projector view may still cover up part of your scene. Let’s hide these unwanted screen elements.
 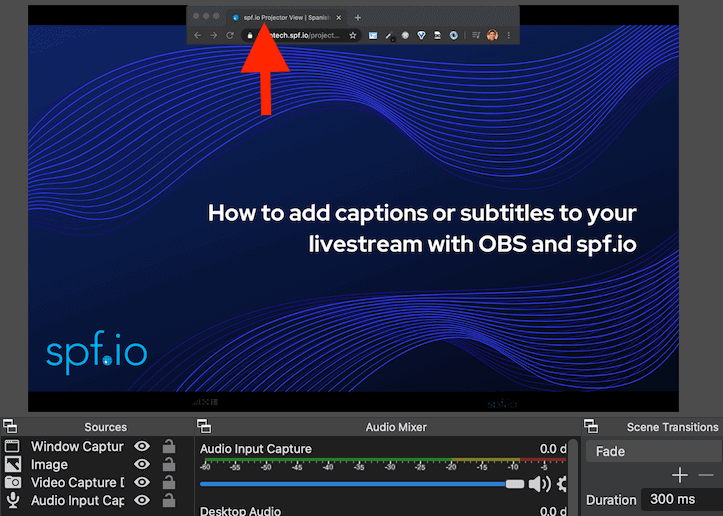 To do so, right click on your Window Capture source. In the menu, go to “Transform” and click on “Edit Transform”.
 ![]() You will see a window that lets you crop the top and bottom of your window. Increase the top and bottom crop amounts until the unwanted parts of the projector view are no longer visible in the preview.
You will see a window that lets you crop the top and bottom of your window. Increase the top and bottom crop amounts until the unwanted parts of the projector view are no longer visible in the preview. 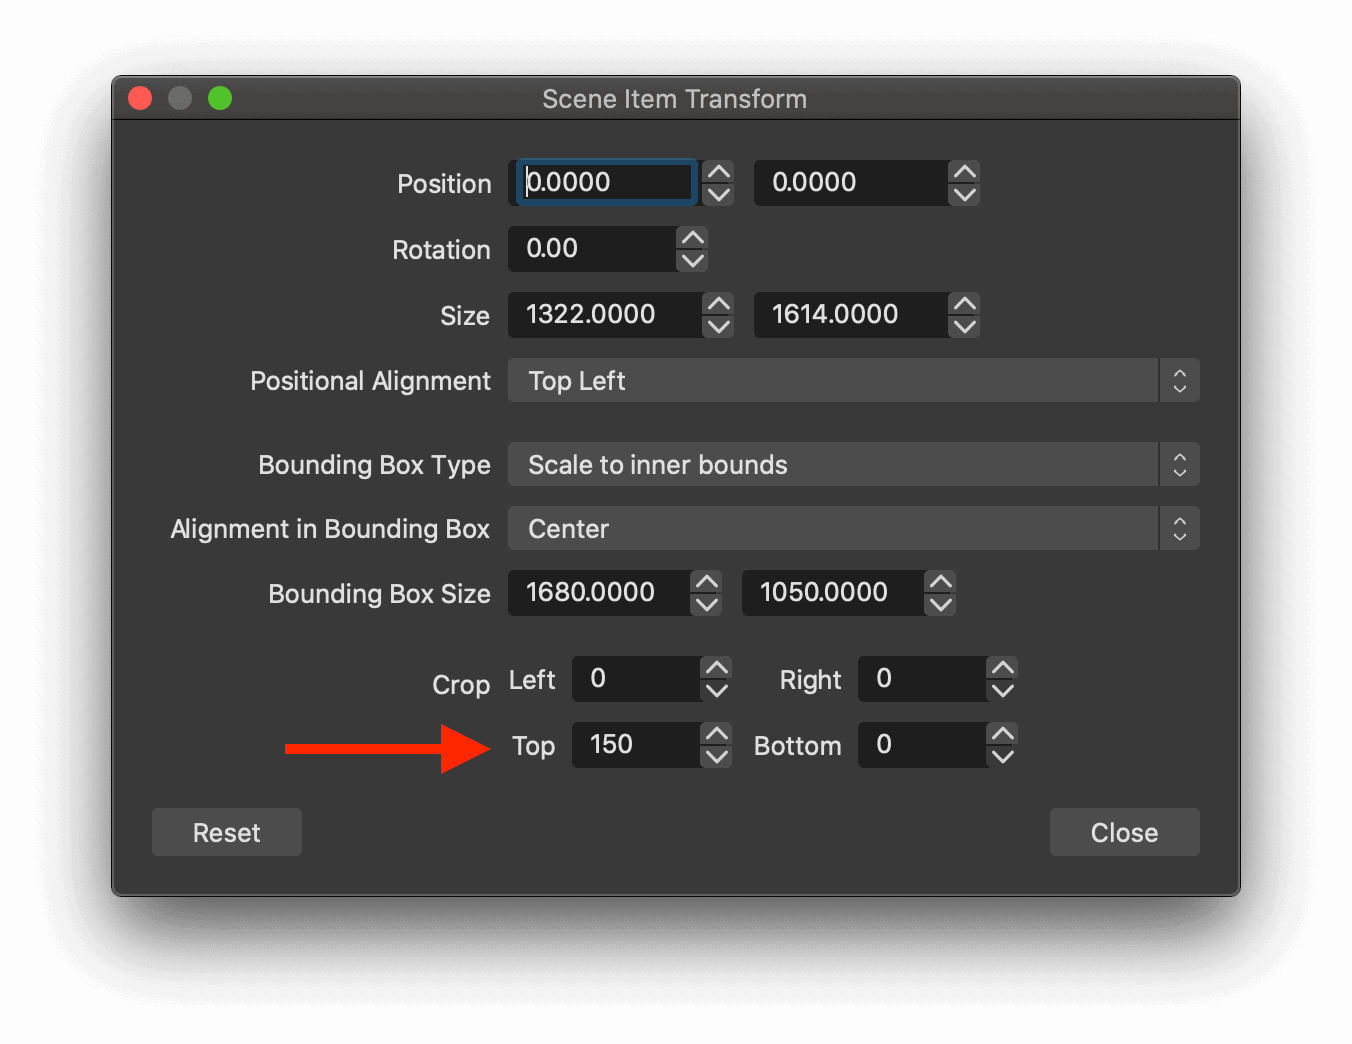 Now your preview should look something like the image below.
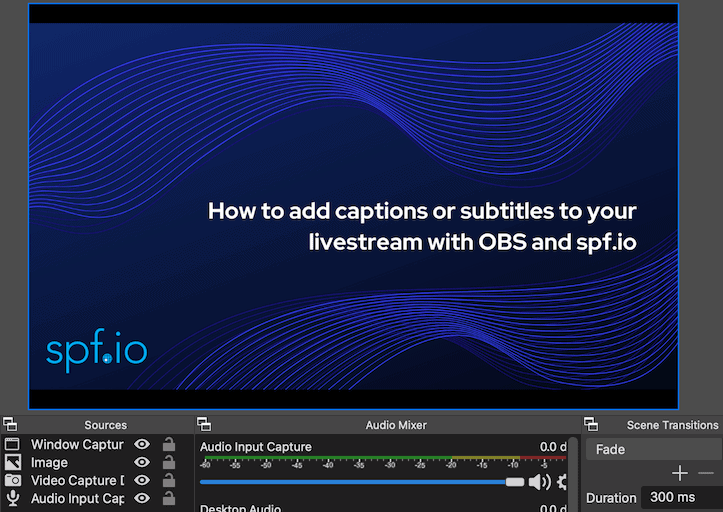
Step 6: Speak and see the subtitles in OBS!
To test if the captions or subtitles are appearing in our OBS preview, ensure that the microphone is on in spf.io and begin speaking. You should see the words appear in OBS in the lower third of the screen! 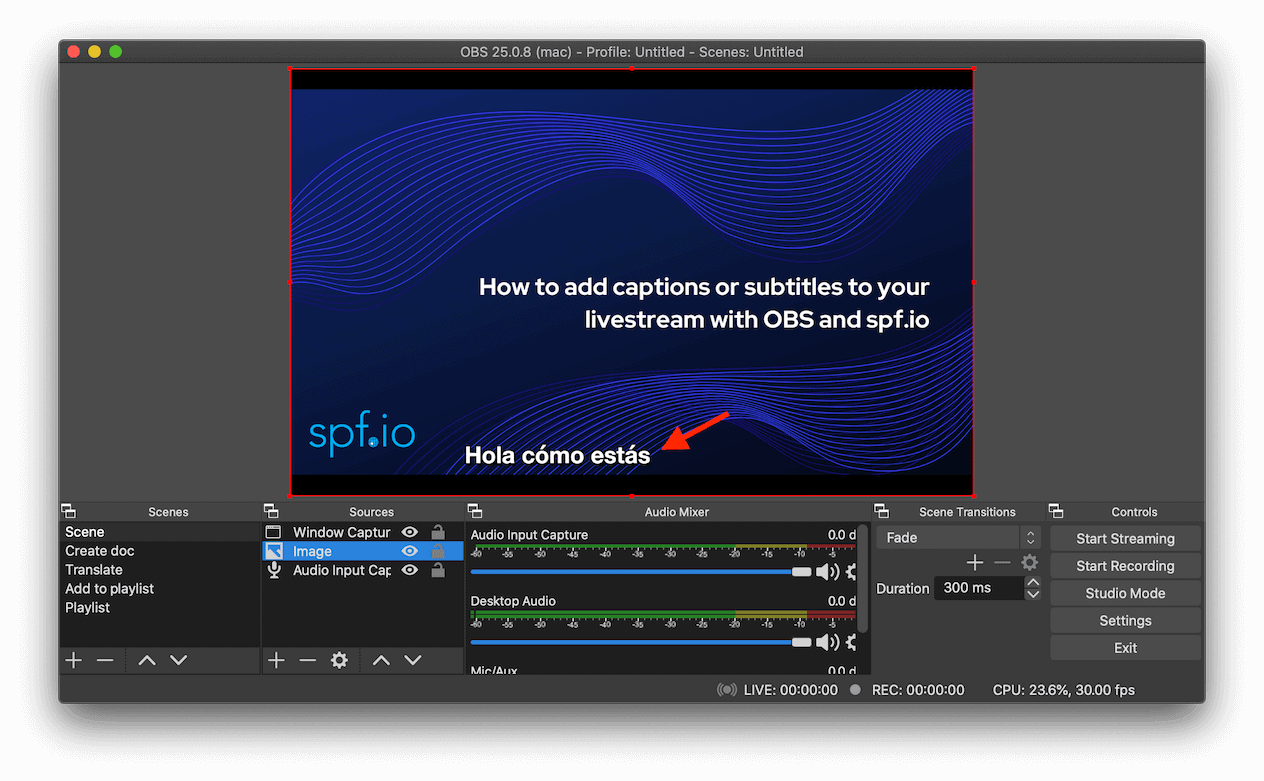
Method 2: Closed Captions
Closed captions mean that viewers can choose whether or not they want to see the captions you provide. OBS can stream closed captions to Twitch or Vimeo through spf.io with the following method.
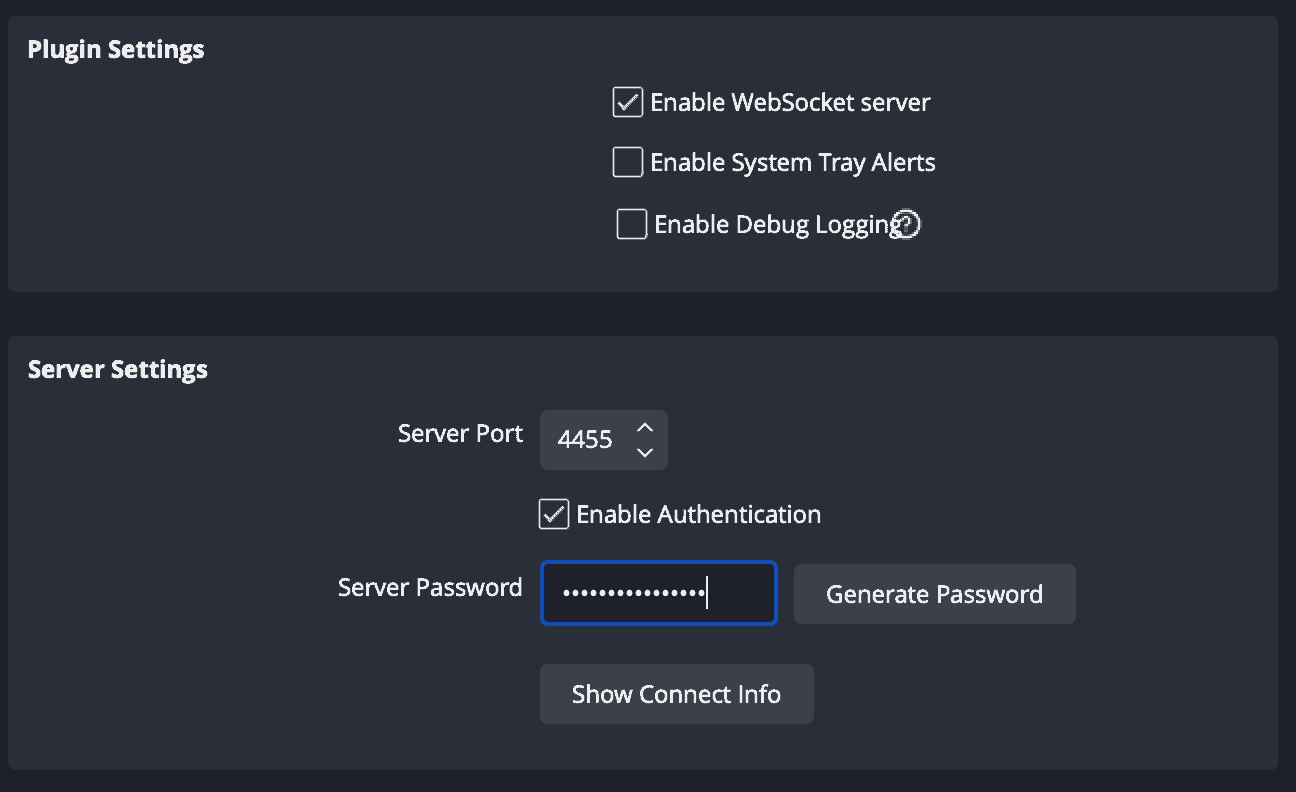
Step 1: Get your OBS Websocket Server Settings
In OBS go to Tools > WebSocket Server Settings. Ensure “Enable WebSocket server” is checked off. The default Server Settings should be sufficient. You can set a password if you wish.
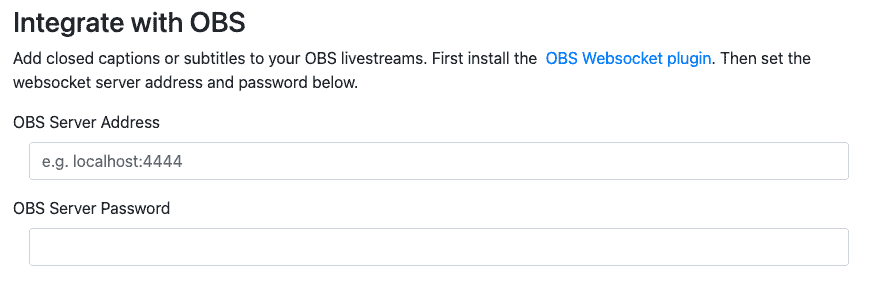
Step 2: Configure your spf.io OBS integration
In spf.io, go to Settings > Integrations > OBS and set the OBS Server Address and Password you set up in Step 1.
If you are running OBS on the same machine as spf.io, use localhost instead of the Server IP (e.g. ws://localhost:4455)
Step 3: Setup your spf.io overlays
Open the overlay for a session. 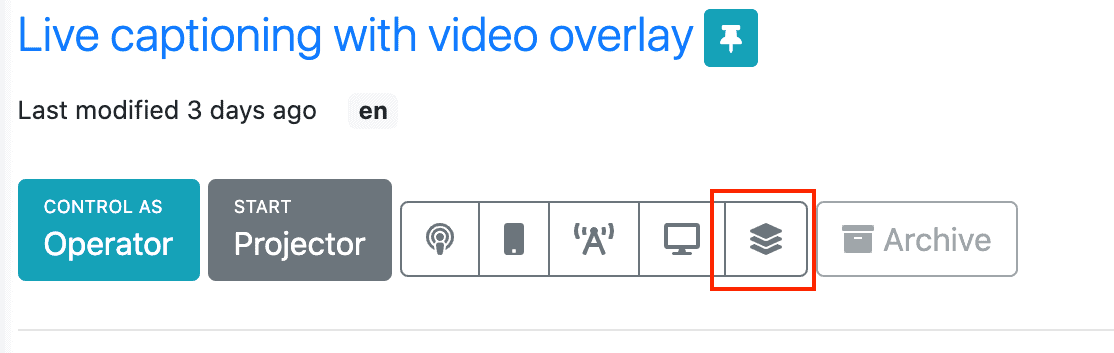
Open the settings in the overlay and go to Integrations
Then enable Send captions to OBS 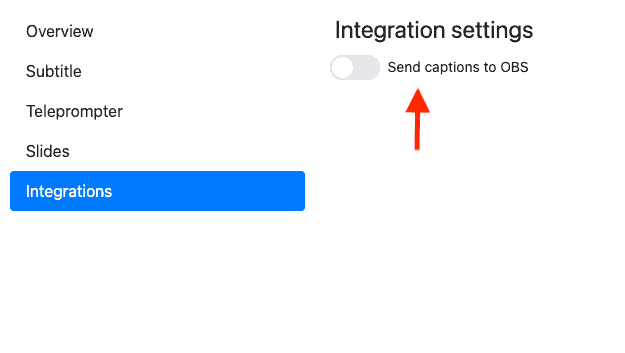
Now any captions or translations that you release through spf.io will be sent in the OBS Livestream. If you stream to Twitch, you can see the closed captions show up in the preview. 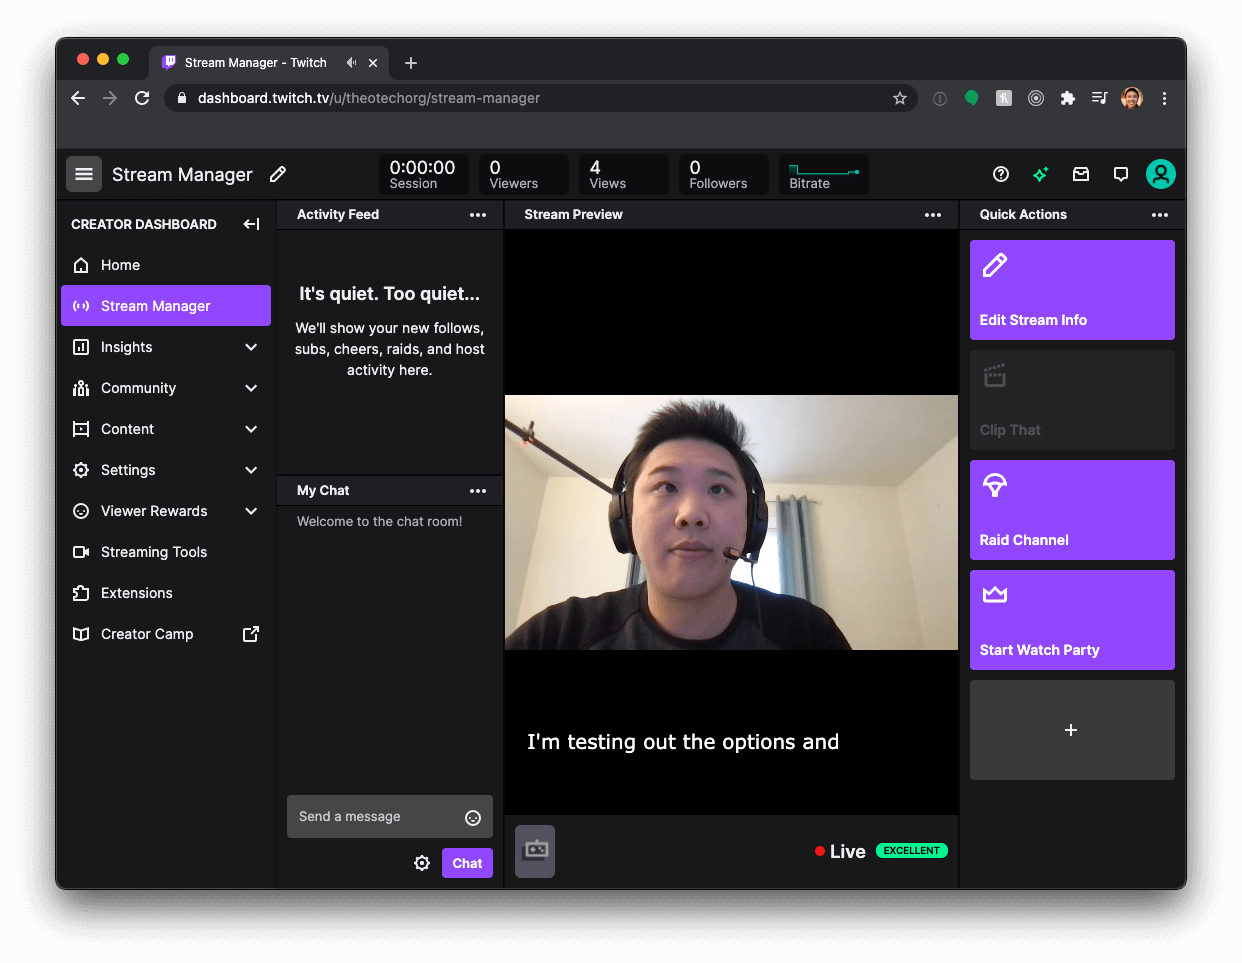 If you stream to Vimeo, you can see the closed captions show up by clicking the CC button and selecting a language.
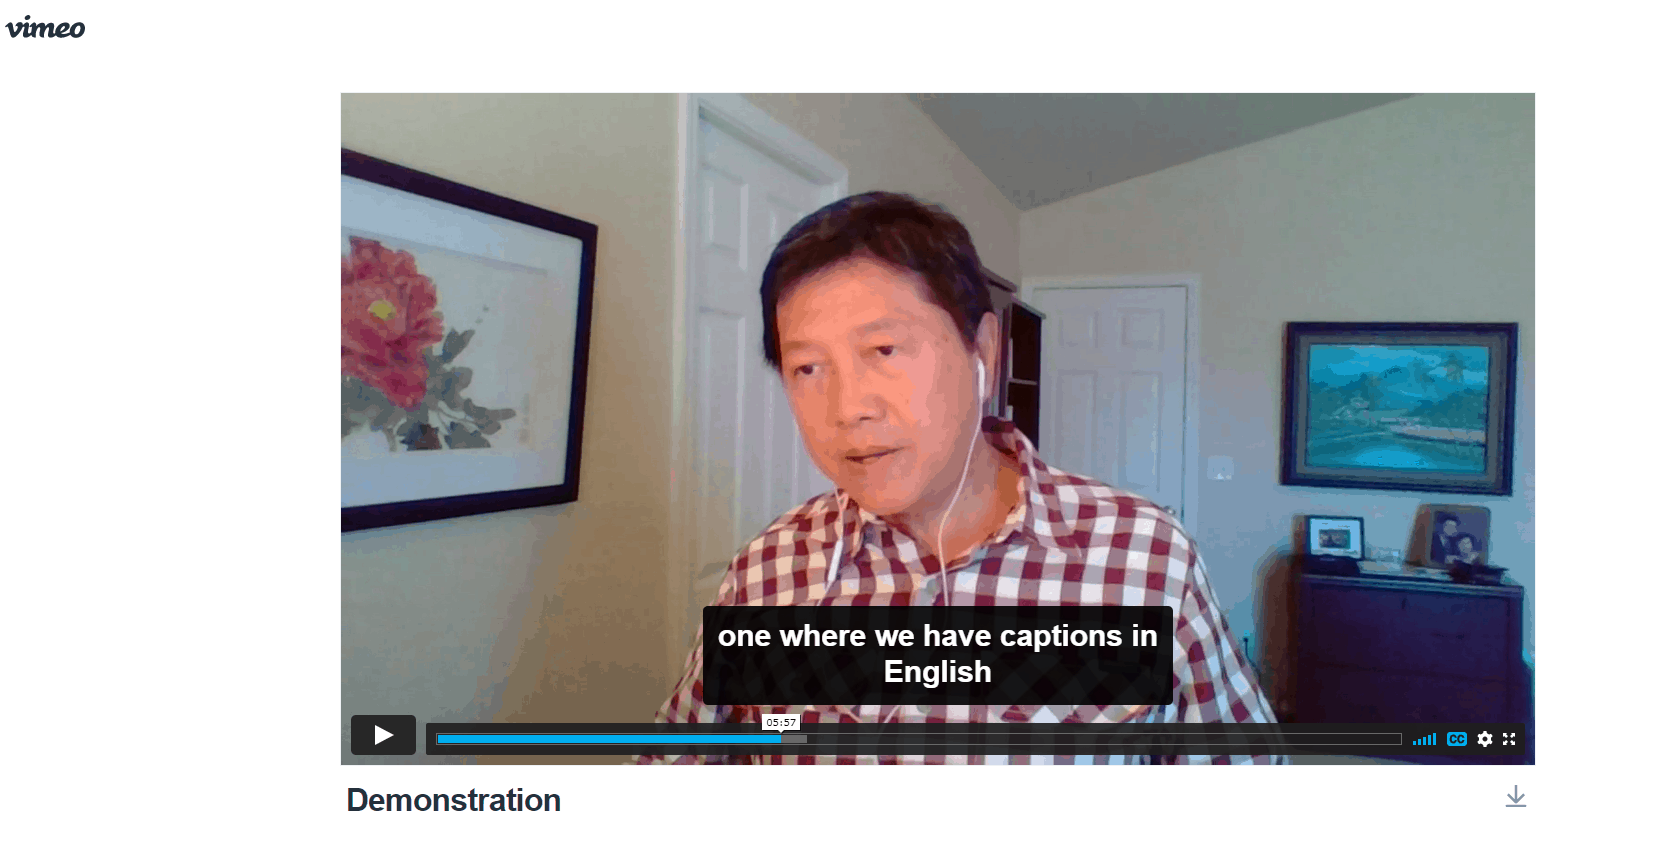
Conclusion
There are several ways to generate captions and subtitles with spf.io ranging from automatic to script based to integrating with a stenographer. All of them can be shown through the spf.io projector view and integrated with OBS as described in this tutorial.