Setting up your microphone/audio input for high quality captions
In this post we are going in-depth on the spf.io microphone setup.
Getting this right is CRITICAL because it will affect the accuracy of the automatic captions and translations you get. Sometimes people assume that simply plugging in a cable will make everything work well out of the box, but there are a lot of nuances that can cause bad results.
The danger is that you may *think* your setup is working correctly because you see captions appearing…but then you feel disappointed by dropped words and poor caption accuracy, not knowing that the browser selected your built-in laptop mic resulting in poor audio, or that the analog cable you plugged in was picking up interference, etc.
Sometimes, even professional audio engineers can get poor captioning results because they apply gates and other audio processing techniques to the sound they send to spf.io.
These techniques are designed to improve the acoustics in the room for their in-person audience, but can impair the accuracy of automatic captions because the AI captioner is trained on recordings that do not have that audio processing applied. This can result in inaccurate captions, and dropped or mis-capitalized words, which in turn affects translation quality.
That’s why most customers on our Automatic Captions and Translations (ACT) plan do an onboarding process where we help them get a reliable, repeatable and high quality setup, which gives them better automatic captions and translation.
So without further ado, here are the steps for setting up your microphone/audio input for spf.io.
5 options for getting audio into spf.io
Work with your venue A/V tech person to get the microphone output from the soundboard into your laptop.
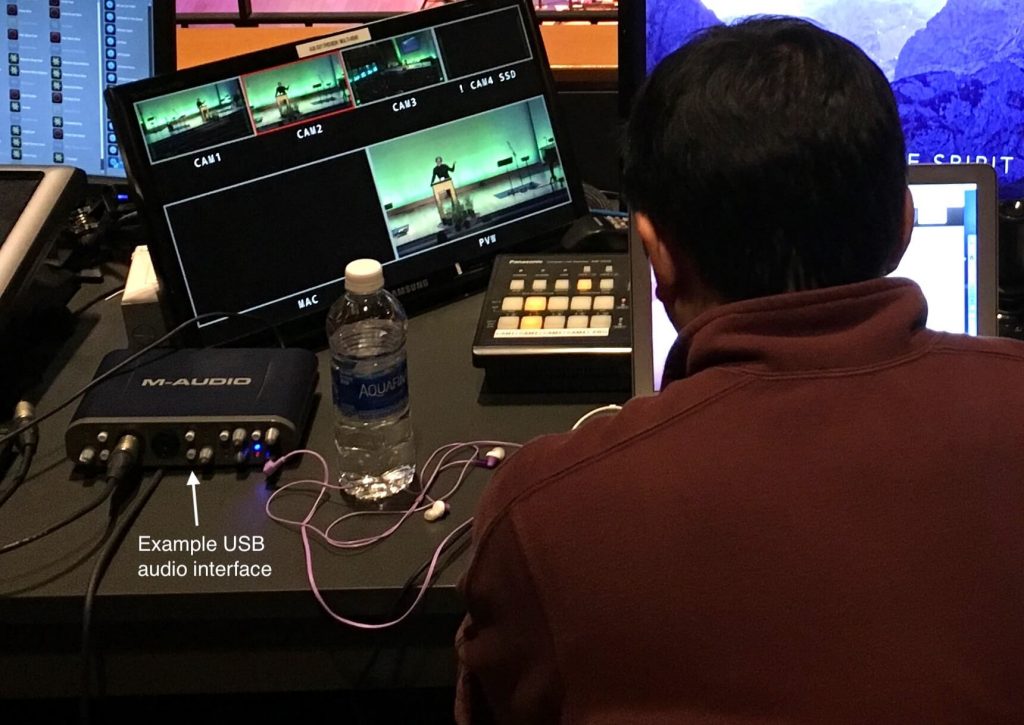
1. Connect through a USB audio interface
Use a USB audio interface device to accept audio out from the soundboard with an XLR cable. The device will plug in directly to the computer via the USB port. Read more about sound board setup here.
One advantage of this approach is that you can monitor the sound you’re sending into spf.io via headphones plugged into the monitor and you can also independently adjust the gain.
2. Use a virtual soundcard/audio input
Some people have access to a virtual soundcard as part of a network based audio system like Dante. If your computer is configured to receive audio over the network this way and can expose it as a microphone input device to the browser running spf.io, you can select that as your audio source.
This is very convenient because it does not require any additional hardware.
3. Use a wireless USB microphone
If you need to use spf.io on the go in many different venues, it can sometimes be difficult to work with the AV team at each location to get a reliable setup. Spf.io offers professional services to help you get setup at each venue, but if it’s only your portion of an event that needs to be captioned and translated you have another option.
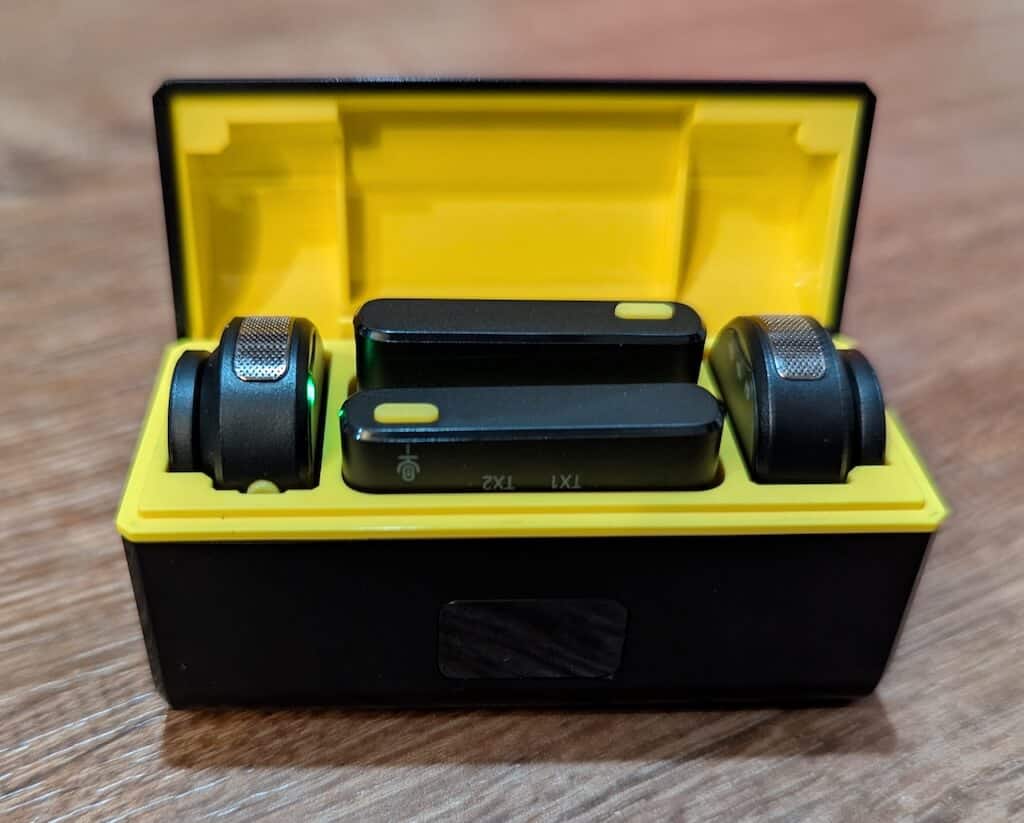
If you are the speaker, you could plug in a high quality wireless USB microphone to your laptop or iPad and wear it on your lapel. This should provide audio that is good enough for captioning and translating on autopilot. Make sure its fully charged and selected in the browser running spf.io.
4. Connect directly with a microphone cable
Plug into the microphone input of your computer.
From the soundboard, get audio out with a 3.5mm male-to-male TRRS cable or 3.5mm to RCA cable. Plug the cable into the soundboard and then plug the other end of the cable into the laptop microphone input.
Find your laptop’s microphone jack.
To check if your laptop has a separate microphone jack, first locate your headphone jack. If you see another similar input with a microphone icon next to it, that indicates you have a dedicated microphone jack.
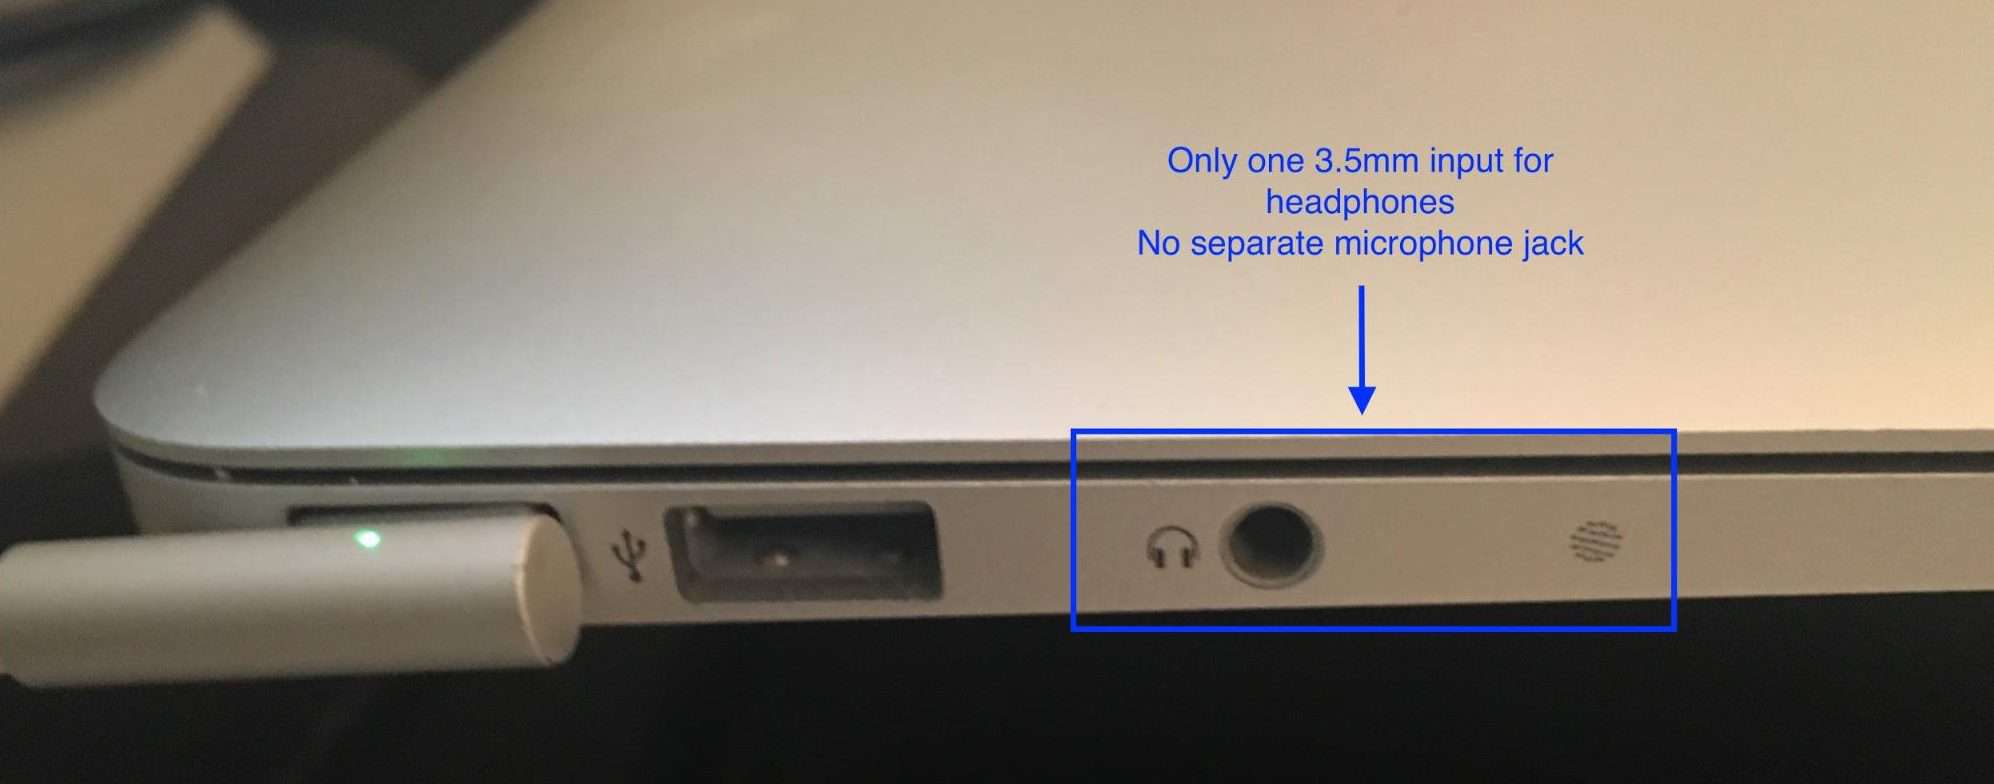
If you have only one input, that means you do not have a dedicated microphone jack and you will need a USB Converter.
On the USB converter, you will see two inputs: one headphone and one microphone (typically pink).
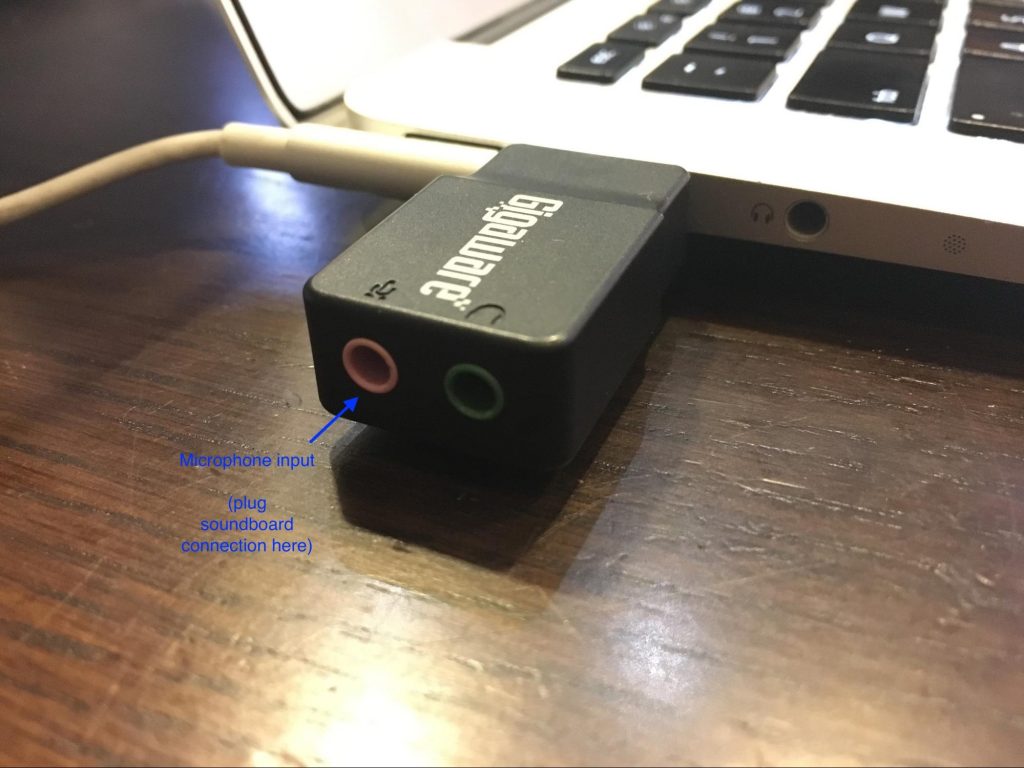
Plug in the USB converter to the laptop and allow a few moments for the device driver to install itself. Plug into the microphone input.
5. Have spf.io join your virtual meeting or livestreaming platform
If you already have a setup that sends your audio to a meeting platform like Zoom, Teams, Google Meet or Streamyard, spf.io has the ability to join the call to source audio from it. This is a feature called Cloud Loopback.
If you are streaming audio to certain platforms like Boxcast, spf.io can integrate with that audio to caption from it. Livestreaming platforms often have a delay, so spf.io needs to integrate at the source to provide the best lag-free experience if you are doing a hybrid event where in-person attendees need captions and translations in addition to the online audience.
Laptop physical setup
There are two simple but important parts to setting up the laptop in the venue. First, get connected to the internet–we highly recommend a wired ethernet connection because it is the most reliable. If your computer does not have an ethernet input, you will need a USB ethernet adapter.
If you need to rely on wifi, have a backup plan in place. One potential backup solution is to use a cellphone as a mobile hotspot.
Remember that when you test wifi, you want to know how it performs under load, not when few people are using it! Many venues have great wifi until a thousand people show up and connect to it, making it slow to a crawl. If your network administrator is able to provide you with a dedicated wifi network with dedicated bandwidth to connect to the internet, that is much better.
And second, don’t forget to plug into a power outlet! If your event goes beyond an hour, this will ensure you can keep going for the entire event.
Selecting the right microphone input in spf.io
Now we need to make sure spf.io is selecting the right audio input to caption from.
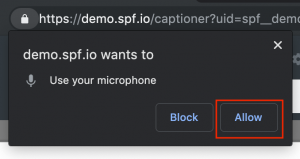
First, open the session’s operator view in spf.io. If it is your first time entering the operator view, it will ask you to allow access to the microphone. Click “Allow”.
Ensure the operator view is opened in the same channel as the language that will be spoken the majority of the time. So for example, if the event is conducted in English, choose the English channel.
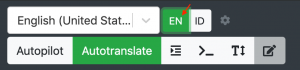
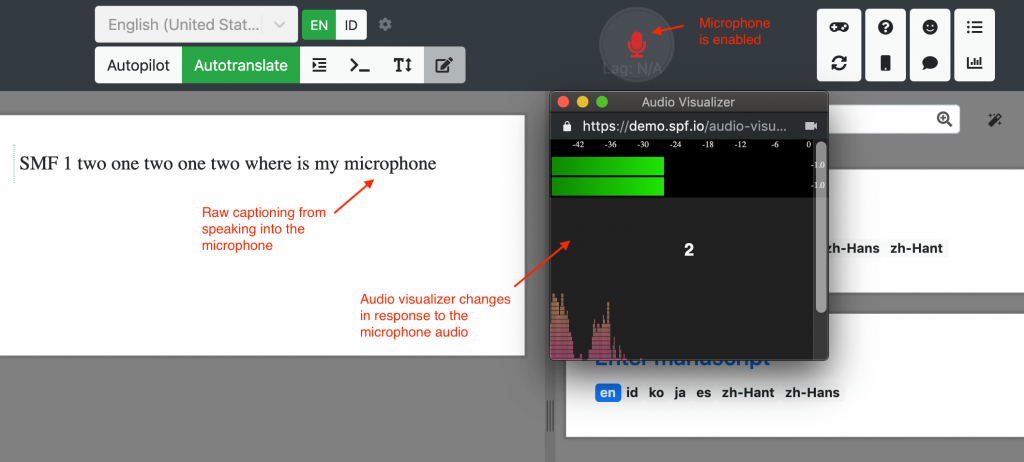
Now turn on the microphone by clicking on the microphone icon.
![]()
Next, we need to confirm that the correct microphone input is selected. In the right-hand side of the browser’s URL bar, click on the Camera icon and note the microphone input selected. NOTE: You do NOT want it to select the Built-in Microphone! If that is the current input, click on the dropdown and select the correct input as the microphone input.

Next, open the audio visualizer to see the sound as it is coming through the microphone. Look for this icon: ![]()
Speak into the microphone to test and confirm the setup is working as expected. If the captioner is enabled, you should see it generating the text it is hearing.
Disable the captioner once your testing is complete until your event begins.
Common Setup Mistakes
We see a few mistakes that can cause issues in the microphone setup. If you’re experiencing some problems, try checking for the issues below.
- The wrong microphone is selected – be sure to select the correct input as the Microphone input. It should not be using the built-in microphone.
- The wrong language is selected – be sure the interpreter view is set to the correct language.
- Microphone audio is too loud or too soft – use the audio visualizer to ensure the audio coming through isn’t causing clipping, or isn’t so soft that the captioner is unable to pick up anything. Applying compression to the audio may help (work with the A/V tech person on this).
- Poor internet – as we have mentioned, it is extremely important to have reliable internet. The best way to guarantee this is to have a wired ethernet connection with your laptop. If that isn’t possible, then we recommend tethering with a mobile hotspot that has a strong connection within the venue.
- The incorrect locale is selected – for example, if the speaker is speaking English but their accent is British rather than American, selecting “United Kingdom” would be the better locale than “United States”.
How can I tell if my audio is good enough?
Run the captioner on some real speech through your setup with autopilot on. This will release the captions and you can then inspect the history of your session to read the captions and see if they seem largely accurate and readable. If you are seeing a lot of unintelligible captions and dropped words, there may be something wrong with the input audio.
As a control experiment, you can use spf.io’s feature to “Use desktop audio as audio input” and playback a Youtube video with clear speech (e.g. a recording of a prior event) to see how the captioner performs on it. If it is captioning well, then you know adjusting your real world audio setup to match the kind of audio in the YouTube video will give you similar results.
You can iteratively work through each part of your audio setup until you attain the quality of captions that you know is achievable by comparing it with the control.
We help many customers do this as part of our onboarding process.
Conclusion
So there you have it! We’ve gone over the requirements for the spf.io microphone setup and the various available options. We also discussed some of the common setup mistakes that you can double check to avoid issues. If you still have any questions, feel free to contact us. We offer training, onboarding and technical services to help you get a reliable, repeatable audio setup to produce high quality captions.