
How to Add Video Slides to Translated Presentations
1. Upload the video that has subtitles or an audio dub to your spf.io media library.
2. Go to the Slides menu and select the deck you’ve uploaded.
3. In the Slide Editor, click the Translate icon at the top to add translation.

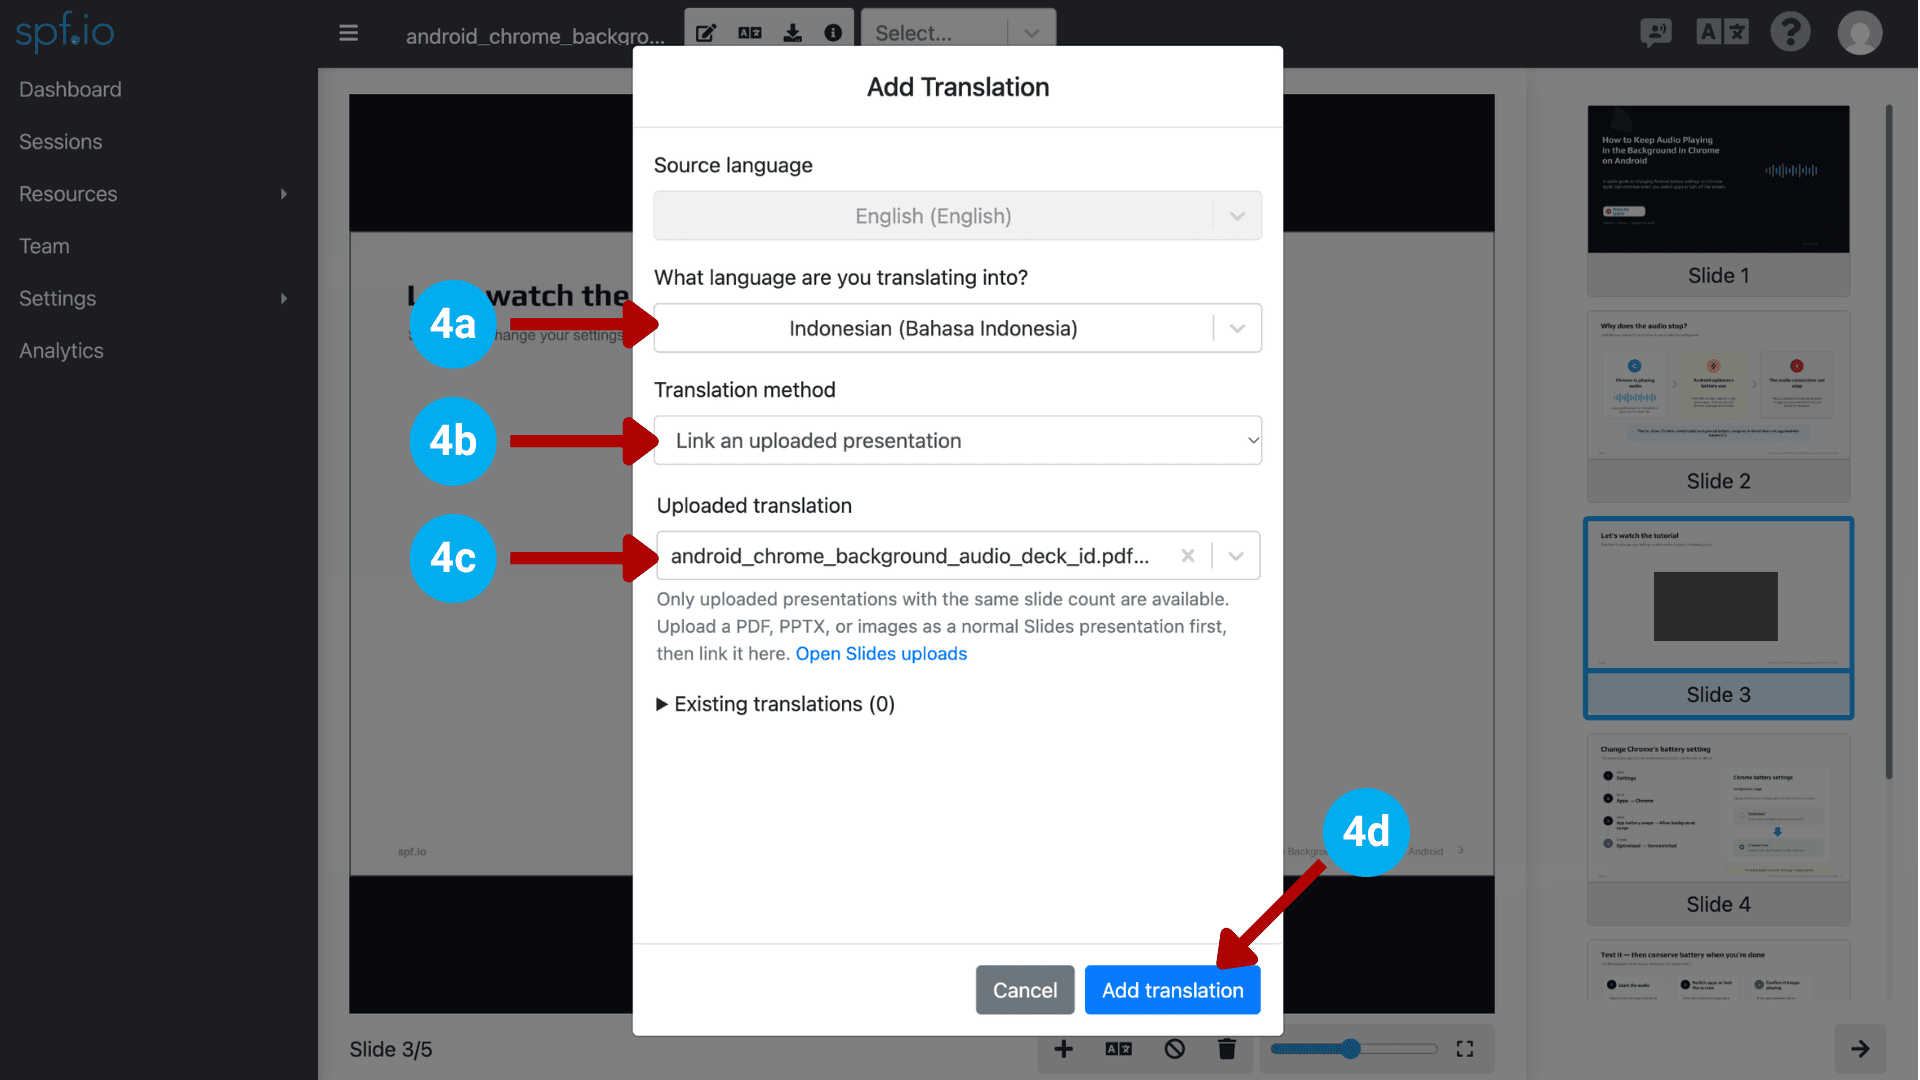
4. To link the deck to a translated presentation you’ve uploaded, choose the target language, select “Link an uploaded presentation” in the Translation method, and select the translated slides from the dropdown menu. Then, click Add translation.
5. Click the + icon to add a slide.

6. Click Import from existing media.

7. Select the video from the dropdown and click Import. The video will be added as a slide in your presentation.

8. Remove the static placeholder slide for the original video, if necessary.
9. Repeat these steps for any additional videos and for each language, then drag the video slides into the correct position in each translated deck.
Note: To let audience members watch the video on their own devices, enable “Play video slides in audience view” under the Audience Interaction settings for your session.

To present the slides, assign the slides to your session and open the projector controller. Release the slides by clicking the Next or right arrow button.

The video will automatically play in the Projector View, while in the Audience View, your audience can click the play button to watch the video.
Here’s an example of multilingual video playback in the Audience View.