Adding a Reviewed Song Translation in spf.io with PowerPoint Files
This guide walks through creating a song document from a PowerPoint file, adding a human-reviewed translation, and showing that translation on screen during a session. The example uses the hymn “Holy, Holy, Holy” with its Spanish translation, “Santo, Santo, Santo.”
Part 1: Create the song document
1. Go to Documents and press Create Song.

2. Upload the PowerPoint file.

3. Check the preview, then scroll down and click Create Song.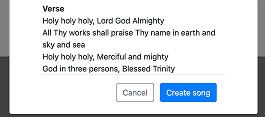
Part 2: Add the translation
4. In the Doc Editor, click the Add Translation button
5. Select the translation language.
6. Choose how to add the translation. You can create a blank translation and type the content yourself, or use Add from Clipboard, where AI takes text you’ve copied (from a website, a document, anywhere) and aligns it with the source.
For this guide, we’ll copy “Santo, Santo, Santo” from Hymnary.org. Select all the text you want in the translation, including the title and copyright information, and copy it.

7. In spf.io, click Add from Clipboard. AI will process the text.

8. Review the preview and click Accept. The translation is shown lined up with the source. If you spot mistakes here, you can fix them in the Doc Editor after accepting.

9. Fix any alignment mistakes in the Doc editor. When you’re done, mark the translation as All lines reviewed and Save.

Why this matters: Marking a translation “All lines reviewed” tells spf.io to use your vetted translation for this song in the future instead of machine translation.
Part 3: Upload and translate the slides
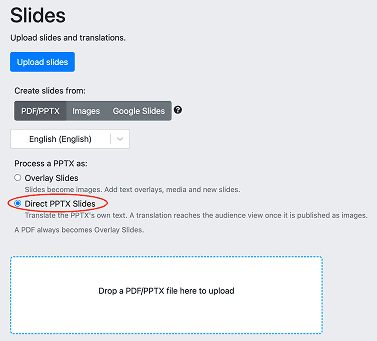
10. Upload the original PowerPoint. Go to Resources → Slides and click Upload Slides. In the options that appear, select the PDF/PPTX tab, choose the language, and select Direct PPTX Slides. Then upload your original PowerPoint file.
11. Translate the slides. Once the upload finishes, click the translation button in the top bar.

Select the language to translate into and click Translate.

The translation that appears should match the one you added to your song document in Part 2.

Part 4: Add the slides to your session
12. Open your session and scroll to Session Resources at the bottom. Select the Basic tab, and in the Slides column for English, click Click to set.

13. Select the English file (“Holy Holy Holy.pptx”).

The translated slides are added automatically.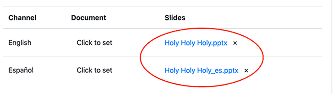
Part 5: Test it
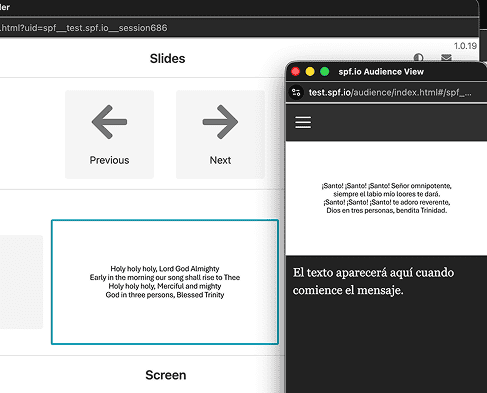
14. Open Audience View and Projector Controller.

15. In Audience View, select the translation language.
16. In Projector Controller, advance a slide.

Result: The reviewed translation should appear in the screen area of Audience View.