Last updated: September 28, 2021
Automatic captioning for your Zoom calls is a convenient way to enhance your meeting. In this article, we’ll go over how “loopback” your audio. This will allow you to provide automatic captioning on Zoom calls yourself.
Note: spf.io recently added support for “Cloud Loopback” which greatly simplifies getting loopback audio by not requiring installation of any additional software. Follow these instructions to set that up. The rest of this article is for reference if local loopback is still required.
This loopback audio method is useful where:
- You are an event organizer supporting a Zoom meeting for a client
- Multiple people on the same Zoom call will be speaking
- You do not have someone to manually caption your meeting
As you prepare to use this feature, make sure that you:
- DO have a separate computer that can be used for auto-captioning
- Understand the risk of mistakes that come with auto-captioning
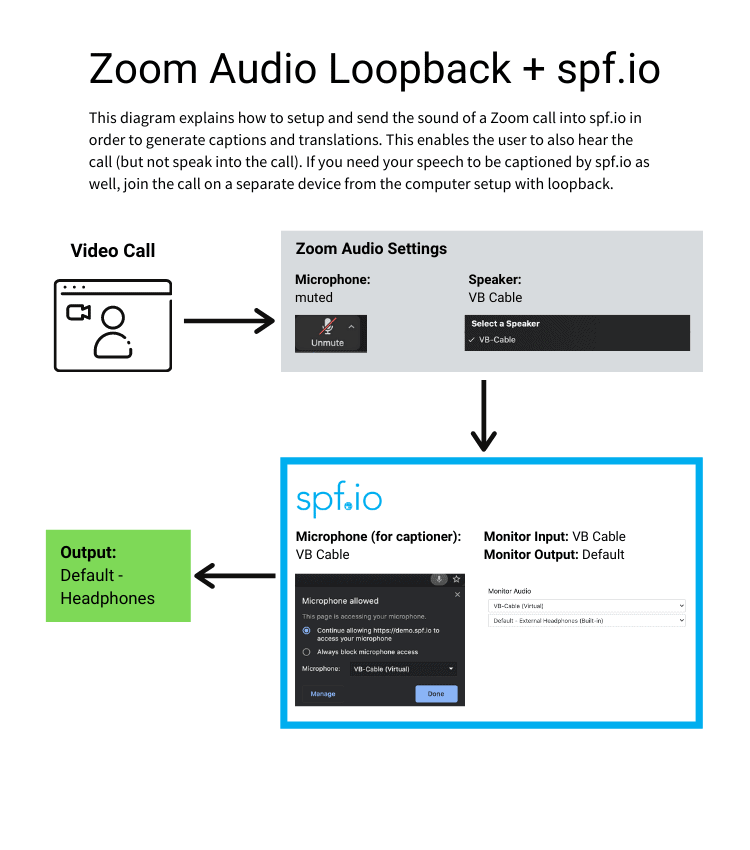
In order to caption multiple speakers on the Zoom call, you will need to loopback audio from your meeting. This routes the sound into spf.io to generate captions. Below is a diagram explaining how it works (this applies to OBS as well).
Here are the steps to set up and loopback audio of a Zoom call.
IMPORTANT NOTE: If you also need to speak in the call, you need two devices. The computer set up to auto-caption the Zoom meeting must be a separate device from the one that you yourself will use to participate in the Zoom meeting.
Computer Setup: For Mac | For Windows
For both Mac and PC: Within-spf.io Setup | Zoom Setup
Computer Setup For Mac
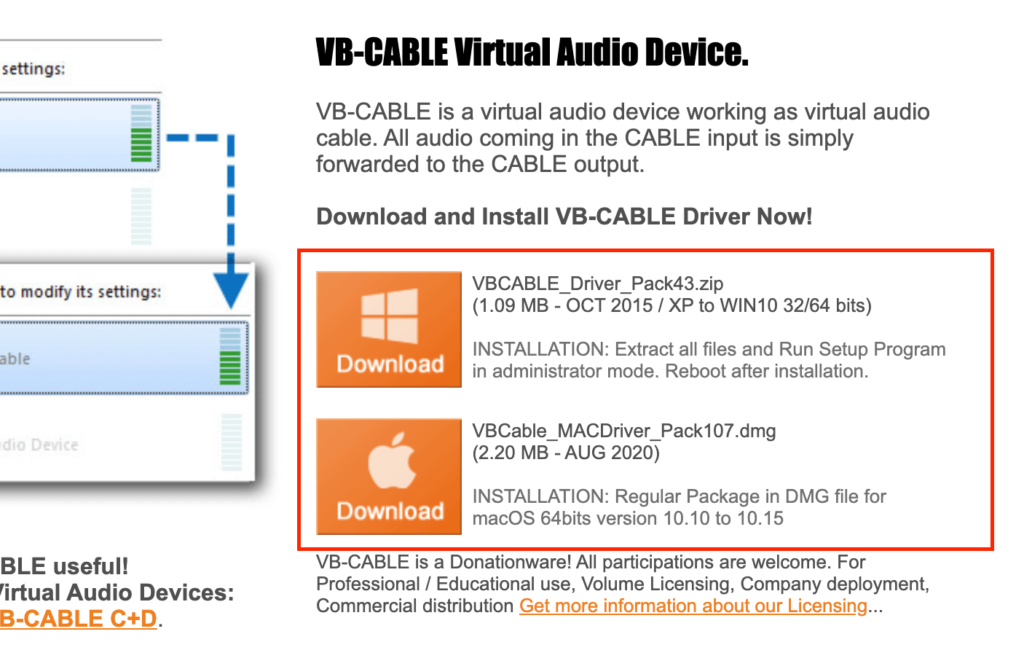
1. Download the VB-CABLE Virtual Audio device from their website and complete the installation. It is free to download.
Advanced Setup (optional)
*VB Cable should function upon installation. Do not take these steps unless advised by the spf.io team.*
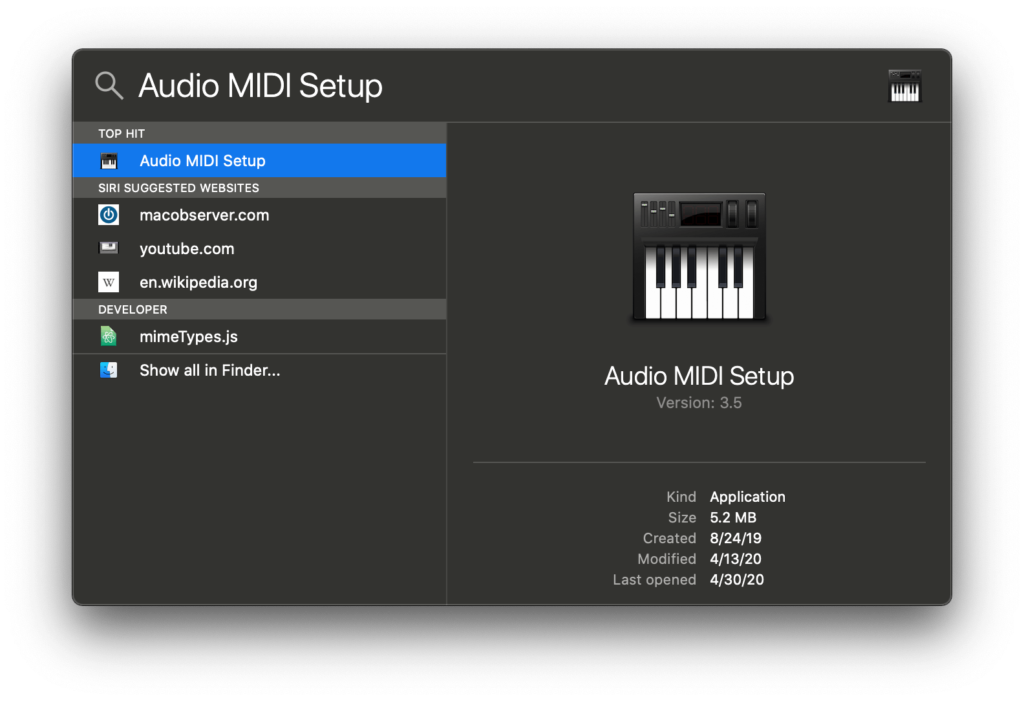
2. Once the installation is complete, open the Audio MIDI Setup application on your computer. One shortcut to do this is to press Command + Space Bar and type in “Audio MIDI Setup” then press Enter.
3. This opens the application and displays all the audio devices you have available on your computer.
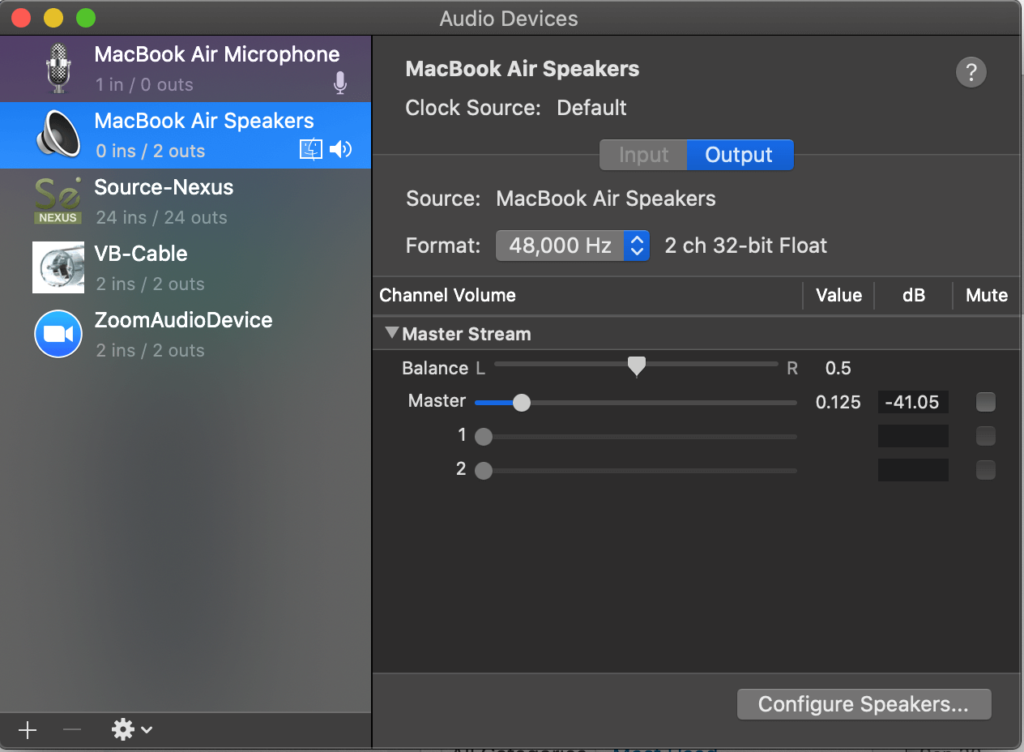
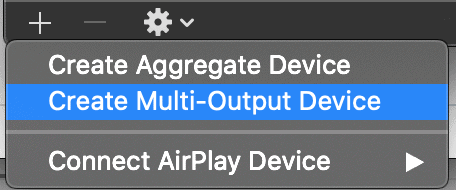
4. Click on the “+” icon in the bottom left hand corner and select “Create Multi-Output Device”.
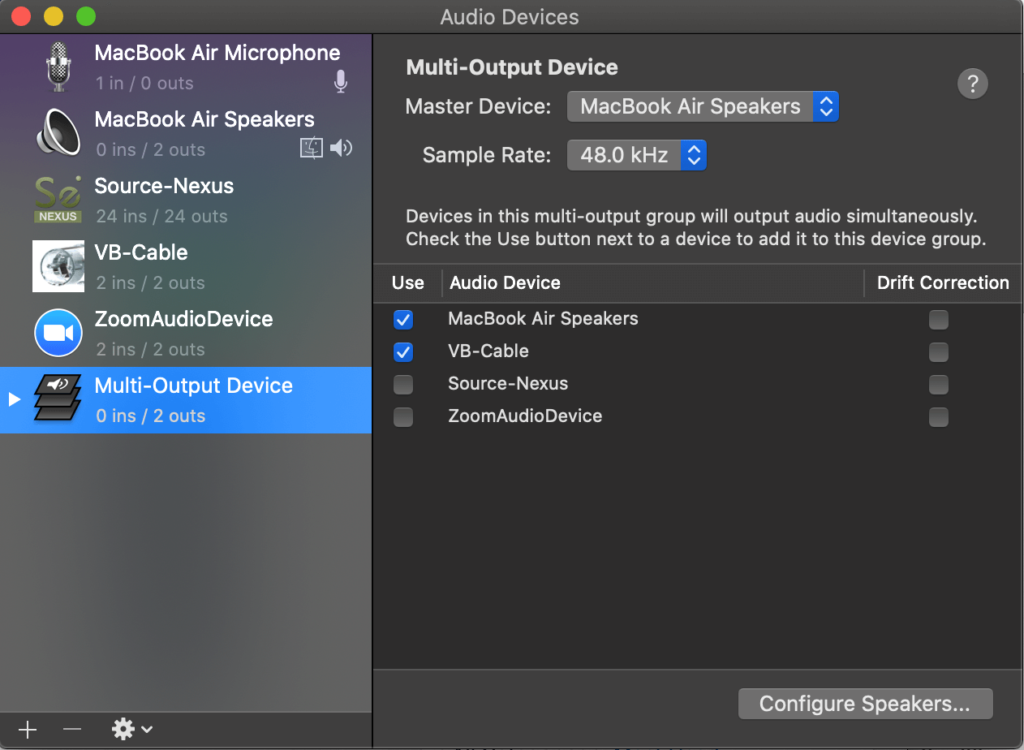
5. This will create a new audio device. Select both VB Cable and the speakers to be used.
6. Open your computer’s System Preferences > Sound, under the Output tab, select “Multi-Output Device”.

Computer Setup For Windows
1. Download VB Cable for Windows and install the virtual audio device.
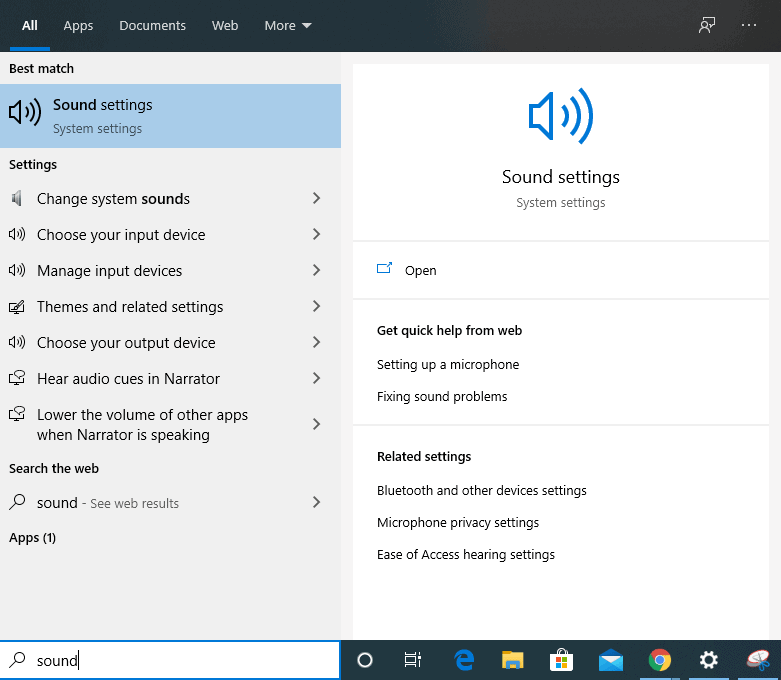
2. Open the Sound settings on your Windows machine.
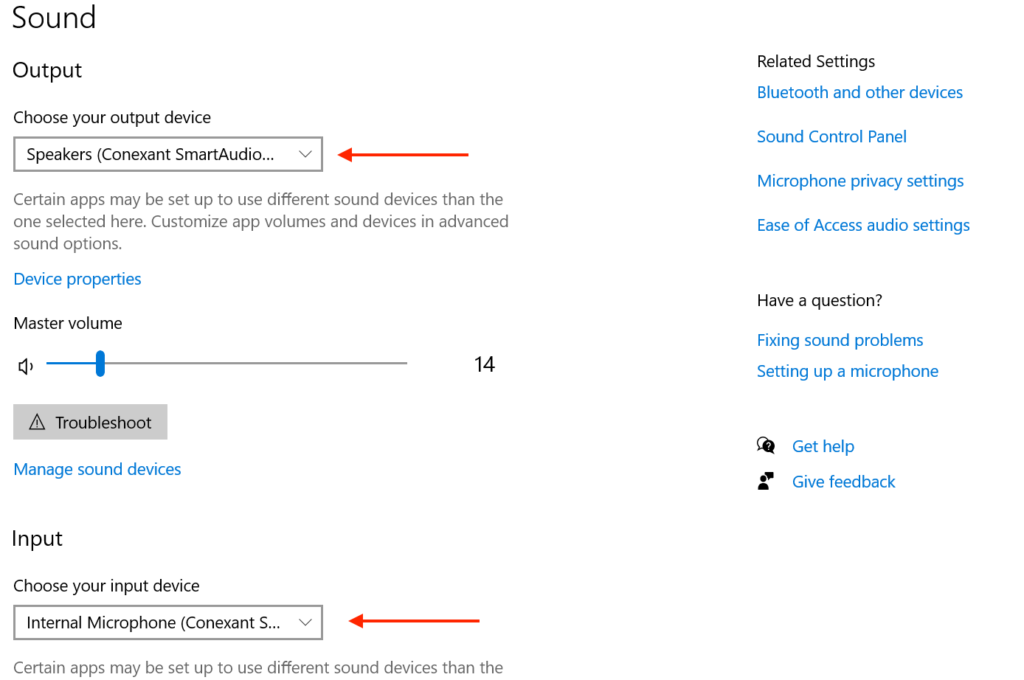
3a. Click “Choose your output device.” Ensure your built-in speakers (or headphones) are still set as your default.
3b. Next, do the same with your input device by going back to Sound settings and choosing “Choose your input device.” Make built-in microphone (or whatever you normally use) is still set as your default.
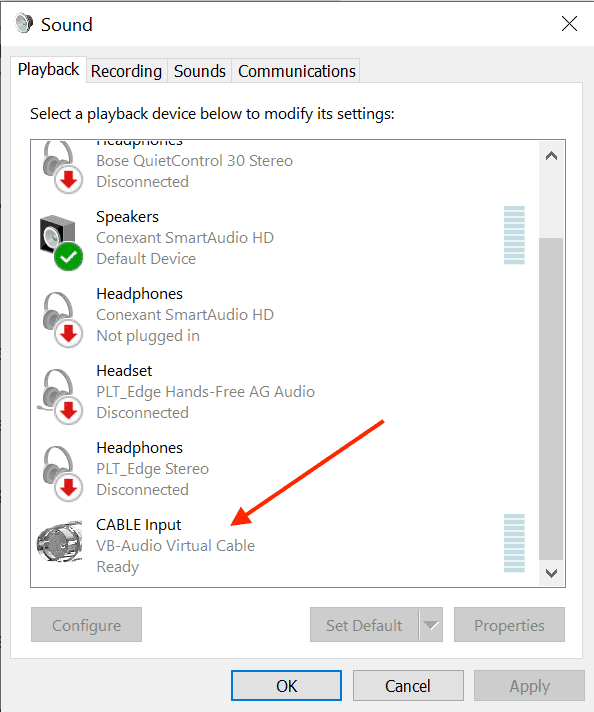
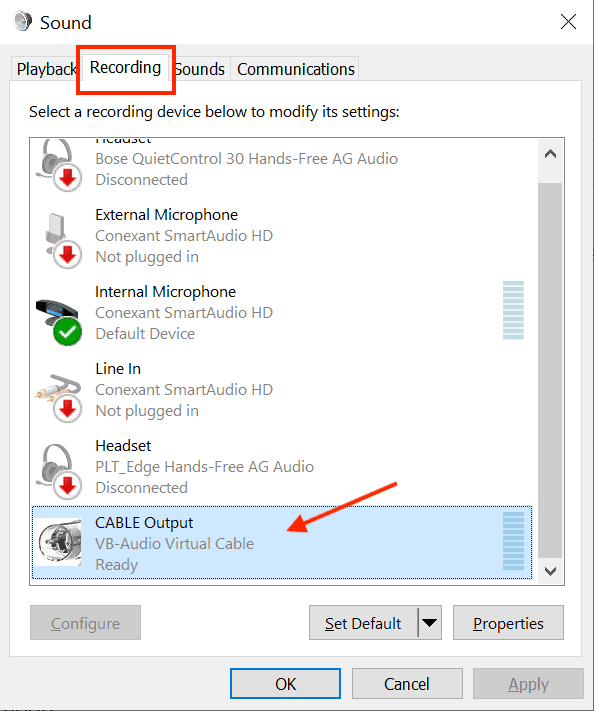
4. Next, still in the Sound menu, click on “Sound Control Panel”
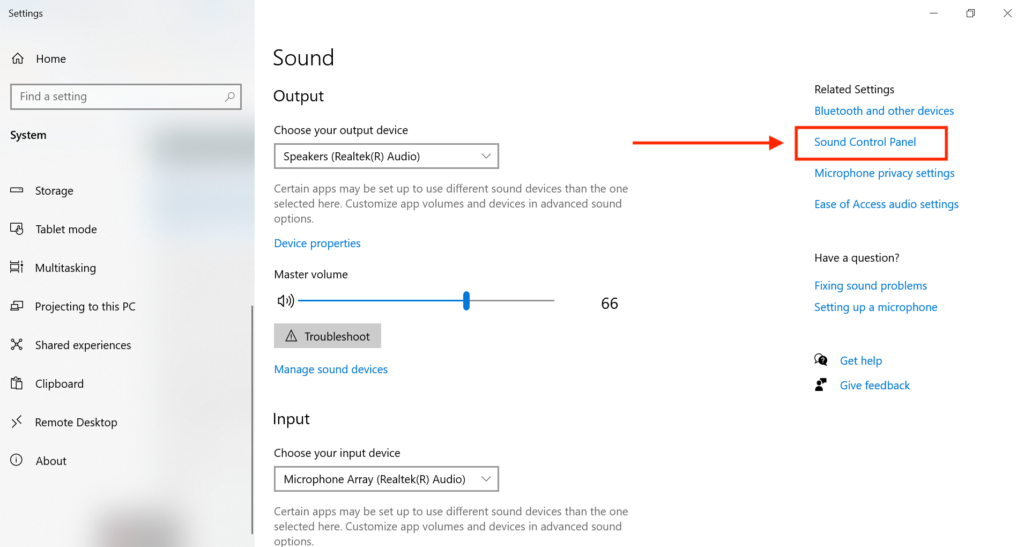
5. A new window will appear. Confirm that the VB Cable device is enabled in the BOTH the Playback tab and in the Recording tab. If it is not enabled, right click on it and select “Enable”.
6. Finally, click “OK” to close the Sound settings.
Within-spf.io Setup
1. Log into spf.io and create a new session. Set up spf.io as you normally would for either raw captioning or auto-caption and translate. Then, open it by clicking Control as Operator. If your browser asks for microphone access, click “Allow.”
2. Select the channel of the spoken language in the meeting. This should be in the upper left corner of the captioner screen. Click on the correct language and then click on “Autopilot” so it is enabled.
3. Set the spf.io captioner’s input and output sources. In upper left-hand area, near the language channel selector, is a small gear. Click the gear to open spf.io’s input-output menu. Then, set the “Input” bar to VB Cable, connecting spf.io to Zoom. Next, set the “Output” bar to your listening device (headphones, speaker, etc), so you can hear the sound from Zoom as well.
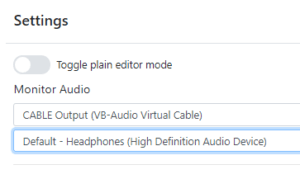
Note: you will notice that sometimes the VB Cable file names itself with the word “output.” Don’t let this confuse you! For our purposes, during this step the VB cable should be in the first dropdown menu (spf.io’s input), and your headphones/speakers in the second (spf.io’s output), as shown above.
What if the dropdown menu is empty? Click here.
If no options appear when you click your dropdown menu, try refreshing the captioner’s browser. This should let your browser fetch the data and fill the dropdown list.
![]()
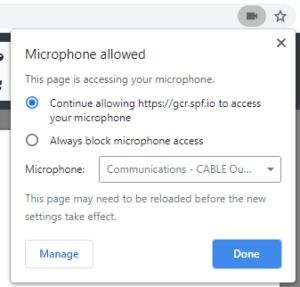
4. Ensure the browser is also set to to the correct source. To do so, click on the microphone or video camera icon in the URL address bar to see which input it has selected. You want “VB-Cable (Virtual)” to be selected. If you changed the input, you may need to refresh the captioner window for the change to be picked up.
What if it is set to the wrong microphone and grayed out? Click here.
If the microphone is incorrect but you cannot change it, click back into the captioner. Click on the main, center microphone icon as if you were going to start captioning. Then go back and click the address bar icon again. You should now be able to change it.
If this doesn’t work, you may need to click “Manage” and change your microphone in the Chrome settings.
5. Turn on the microphone by clicking the large icon in the middle of the captioner header. It should turn red to show it’s transmitting.
Zoom Closed Captioning Setup
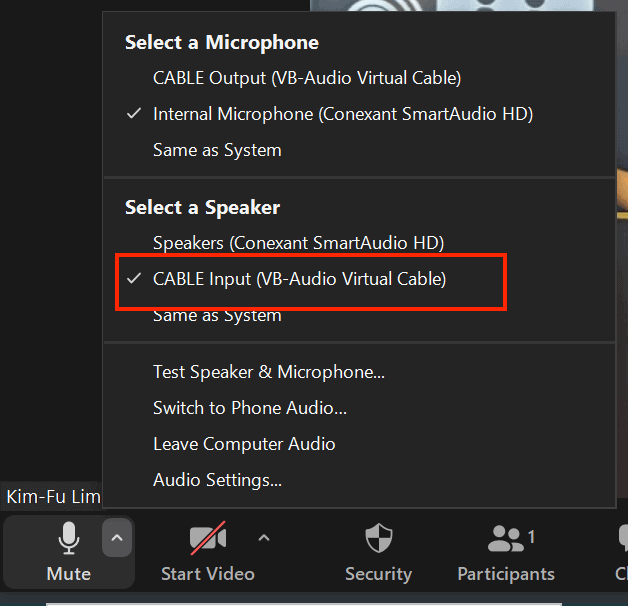
1. In your Zoom call, click on the arrow next to your microphone button to set the microphone and speaker settings. Select the Speaker as “VB Cable”.
2. If you want to show captions in Zoom using the closed caption API token, follow instructions here.
Note: The computer setup to auto-caption/translate the Zoom meeting must be separate from the device that you yourself will participate in the Zoom meeting.